Learning how to print checks in QuickBooks Online requires four things to be in place before you click print. Missing any one of them causes the most common printing failures.
- An active QuickBooks Online subscription. Check printing is available on all QBO plans: Simple Start, Essentials, Plus, and Advanced. No additional module is required.
- QuickBooks-compatible MICR check stock. QuickBooks Online does not print on blank paper. The check stock must be pre-printed with your company name, address, ABA routing number, and account number in certified MICR magnetic toner. The paper must be 8.5 by 11 inches and formatted to match QBO's print template in your chosen style (Voucher, Standard, or Wallet).
- A laser or inkjet printer. Both work. Laser printers produce sharper MICR output when printing variable payment details. Alignment accuracy is the most important factor regardless of printer type.
- Adobe Acrobat Reader (free). QuickBooks Online generates a PDF when you print checks. You must open and print that PDF through Adobe Acrobat Reader specifically, with scale set to 100 percent (Actual Size). Printing through a browser PDF viewer or at any scale other than 100 percent causes misalignment.
Choosing the Right Check Stock to Print Checks in QuickBooks Online
The most common reason how to print checks in QuickBooks Online fails is not a software problem. It is a check stock mismatch. If the physical check stock you load into your printer does not match the format QuickBooks Online is configured to print, every check in the batch will be misaligned and unusable.
QuickBooks Online supports three check formats. Before ordering check stock, confirm which format your QBO account is configured to use. To check: go to the gear icon, select Print Checks, then Print Setup, and read the check style displayed.
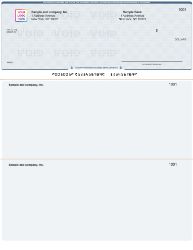
- Voucher (check on top): One check per page with two detachable stubs below. The QuickBooks Online default. Best for payroll and accounts payable where remittance detail on the stub matters.
- Standard (3-on-a-page): Standard checks , three checks per sheet with no stubs. Efficient for high-volume AP where all records are kept digitally in QuickBooks.
- Wallet: Three smaller personal-size checks per sheet. Occasionally used for low-volume personal-style business payments.
Do not order check stock without first confirming your QBO format setting. Ordering Voucher stock when QuickBooks is set to Standard, or vice versa, produces a full batch of unusable checks. See our complete format comparison at QuickBooks-compatible checks guide.
Step 1: How to Set Up and Align Your Printer for QuickBooks Online Check Printing
Printer alignment for checks is a one-time setup that QuickBooks Online remembers for future use. Complete this step before printing your first real check. If you switch printers or change check formats later, repeat this step.
- Go to + New in the top-left corner of your QuickBooks Online dashboard.
- Select Print Checks from the menu.
- Click Print Setup in the top-right of the Print Checks screen.
- Select your check style (Voucher or Standard). The check style in QuickBooks determines which format the software prints to. If you use Wallet checks, select Standard and load Wallet stock.
- Load one sheet of plain white paper into your printer.
- Click View Preview and Print Sample, then click Print.
- Take the printed sample and place it on top of a blank check from your check stock. Hold both up to a light source.
- Check whether the dollar amount, payee name, date, and MICR area on the sample line up with the corresponding areas on the check stock.
- If everything lines up: click Yes, I'm finished with setup. Alignment is complete.
- If anything is misaligned: click No, Continue Setup. Drag the blue grid on the screen to adjust the position of the print output. Move the grid up, down, left, or right until the sample matches the check positions. Print another sample and repeat.
Step 2: How to Record a Check in QuickBooks Online for Printing
Before you can print a check in QuickBooks Online, you must record it. Recording the check enters the transaction into your books and marks it for the print queue.
- Go to + New and select Check.
- In the Payee field, select the vendor, supplier, or employee from your list. If they are not in your list yet, click Add New to create the payee record.
- In the Bank Account field, select the checking account from which this payment will draw.
- Enter the payment Date. For checks you want to print later, use today's date or the intended payment date.
- Check the Print Later box. This is the critical step. Checking Print Later changes the Check No. field to "To Print" and adds this check to the print queue. If you do not check Print Later, the check will not appear in the print queue.
- In the Category field, select the expense account that best describes the payment (supplies, utilities, contractor fees, etc.).
- Enter the Amount in the dollar field.
- Add a Memo if you want reference notes to appear on the check stub.
- Click Save and Close to record the check and add it to the print queue.
Repeat this process for every check you want to print. QuickBooks Online queues all of them together for batch printing.
Step 3: How to Open and Manage the Print Queue in QuickBooks Online
The print queue in QuickBooks Online holds all checks marked Print Later. This is the print queue in QuickBooks where all pending checks wait before printing. You can add as many checks as needed and print them all in one batch.
- Go to + New and select Print Checks.
- From the Account dropdown at the top, select the bank account you are printing from. Only checks from that account appear in the queue.
- Review the list of checks waiting to print. Each shows the payee name, date, and amount.
- To remove a check from the current print batch without deleting it, uncheck the box next to it. Unchecked checks remain in the queue for the next print session.
- To remove a check from the queue permanently, open the check itself, uncheck Print Later, enter a manual check number, and save. This records it as a handwritten check rather than a printed one.
Step 4: Enter the Starting Check Number for QuickBooks Online Printing
The starting check number is one of the most important fields in the QBO printing process. Getting it wrong causes your check number sequence and physical check register to fall out of order, creating reconciliation problems later.
- Look at the first physical check loaded in your printer tray. Read the check number printed on that check (top right corner).
- Enter that number in the Starting Check No. field in QuickBooks Online.
- QuickBooks Online numbers the remaining checks sequentially from there. If you are printing 5 checks starting at check number 1045, QBO will print checks numbered 1045, 1046, 1047, 1048, and 1049 automatically.
For help understanding check numbering and ABA routing numbers on your check stock, see our ABA routing numbers guide.
Step 5: How to Preview and Print Checks in QuickBooks Online
- Load your QuickBooks-compatible check stock into the printer. Face-up or face-down depends on your specific printer model , check your printer manual for the correct paper orientation if you are unsure.
- In the QuickBooks Online Print Checks screen, check the box next to each check you want to print in this batch.
- Click Preview and Print. The preview and print QuickBooks step shows exactly how each check will look before committing to real check stock.
- QuickBooks Online generates a PDF file. Your browser will attempt to open or download it.
- Open the PDF in Adobe Acrobat Reader. Adobe Reader check printing at 100 percent scale is the required method. Do not print from the browser's built-in PDF viewer.
- In Adobe Acrobat Reader's print dialog, set the print scale to 100% or Actual Size. This is the most critical setting. Do not use Fit to Page.
- Select your printer and click Print.
After the checks print, do not remove them from the output tray until you have reviewed every check against the QuickBooks Online preview to confirm correct alignment and information.
Step 6: Confirm Printing Results in QuickBooks Online
After printing, QuickBooks Online displays a confirmation screen. This step is important because it determines which checks are removed from the print queue and which are returned for reprinting.
- Review each printed check against the preview shown in QuickBooks Online.
- If all checks printed correctly: click Yes, they all printed correctly, then click Done. QuickBooks Online removes these checks from the print queue and marks them as printed in your register.
- If one or more checks did not print correctly: click Some checks need reprinting. Enter the check number of the first check that needs to be reprinted. QuickBooks Online returns those specific checks to the print queue. Checks that printed correctly are removed from the queue.
- If none of the checks printed: click Keep all checks in the print list. All checks return to the queue for another attempt after you fix the underlying issue.
How to Print Checks in Batches in QuickBooks Online
Batch printing is one of the biggest time-saving advantages when you know how to print checks in QuickBooks Online correctly. Rather than printing each check individually, you can record as many checks as needed throughout the day or week, then print all of them in a single print run.
Best Practices for Batch Check Printing in QuickBooks Online
- Group checks by bank account. QuickBooks Online filters the print queue by bank account. If your business uses multiple checking accounts, print all checks from one account before switching to the next.
- Sort before printing. Review the print queue before printing and confirm the check sequence makes sense. Printing from lowest to highest check number keeps your check register clean.
- Load the full batch before printing. Count how many checks are in the batch and load that many sheets of check stock before clicking Preview and Print. Running out of check stock mid-batch leaves some checks in the queue with incorrect numbering.
- Print a plain paper test first for large batches. For batches of 20 or more checks, run a quick alignment test on plain paper before loading the full stack of check stock. One test sheet confirms alignment is still correct before committing the full batch.
For businesses printing payroll checks in batches, the voucher format is the standard choice because one stub carries payroll detail to the employee and one stays in your records. See our complete payroll check guidance at QuickBooks checks.
Troubleshooting: Why Can't I Print Checks in QuickBooks Online
If you are having trouble printing checks in QuickBooks Online, one of these six issues is almost always the cause.
Problem 1: Check Does Not Appear in the Print Queue
Cause: The Print Later checkbox was not selected when the check was recorded.
Fix: Open the check from your register. Check the Print Later box. The Check No. field changes to "To Print." Save and close. The check now appears in the print queue.
Problem 2: PDF Does Not Open After Clicking Preview and Print
Cause: The browser's popup blocker is preventing the PDF from opening.
Fix: Look for a popup blocked notification in your browser address bar. Click it and allow popups from QuickBooks Online. Alternatively, click the PDF download link directly and open it manually in Adobe Acrobat Reader. Chrome and Firefox work most reliably for QuickBooks Online check printing.
Problem 3: Checks Print Misaligned Despite Completing Setup
Cause: Adobe Acrobat Reader is printing at a scale other than 100 percent.
Fix: Open the PDF in Adobe Acrobat Reader. Go to File, Print. In the Page Sizing and Handling section, select Actual Size. Never use Fit to Page or Shrink to Printable Area. These settings reduce output by 3 to 5 percent and shift all field positions regardless of how the QBO alignment grid is set.
Problem 4: Checks Print but Bank Rejects Them
Cause: The check stock does not have MICR encoding, uses non-certified toner, or has an incorrect routing number.
Fix: Order QuickBooks-compatible check stock from a manufacturer that pre-verifies routing numbers against the Federal Reserve E-Payments Routing Directory before printing. A routing number error or non-certified MICR toner causes bank reader-sorter machines to reject the check even if it prints correctly on paper. See our QuickBooks-compatible checks guide for check stock that meets these requirements.
Problem 5: "You Don't Have Permission to Print Checks" Error
Cause: The QBO user account does not have Print Checks permission enabled.
Fix: An admin needs to go to Settings, Manage Users, find the user's account, click Edit, and verify that the user has access to banking and expense functions including printing. Standard user roles in QuickBooks Online sometimes exclude check printing by default.
Problem 6: Checks Print Correctly but Numbers Are Wrong
Cause: The Starting Check No. entered in QBO did not match the first physical check loaded in the printer.
Fix: In QuickBooks Online, open each incorrectly numbered check, void it if it has not been issued, and reprint with the correct starting number. Going forward, always verify the number printed on the first physical check in the printer tray before entering the starting number in QBO.
Why MICR Check Stock Matters When You Print Checks in QuickBooks Online
Once you know how to print checks in QuickBooks Online, the software side is handled automatically. What determines whether the printed check clears your bank successfully is the quality of the check stock you use.
What MICR Means and Why Banks Require It
MICR stands for Magnetic Ink Character Recognition. The row of characters at the bottom of every check is the MICR line. It contains your ABA routing number, checking account number, and check number. Bank reader-sorter machines process checks by reading this line magnetically, not visually. For the magnetic reading to work, the MICR characters must be printed in certified iron oxide magnetic toner at the check manufacturing stage, not by your office printer.
When you print checks in QuickBooks Online, your printer adds the payee name, dollar amount, date, and other variable fields. The MICR line must already be on the check stock before it goes into your printer. Check stock without a pre-printed MICR line, or with a MICR line printed in regular office ink, will be rejected by bank reader-sorter machines. The check looks correct to the eye but fails bank processing.
Routing Number Verification Before Printing
A second MICR-related problem is an incorrect routing number on the check stock. Routing numbers change when banks merge, when accounts move between branches, and when regional routing assignments shift. A routing number that was correct when you last ordered check stock may no longer be current.
Checkomatic verifies every routing number against the Federal Reserve E-Payments Routing Directory before printing begins. This catches transposed digits and outdated routing numbers before they produce a full batch of checks that bank clearing systems reject. See our ABA routing numbers guide for how to verify your routing number before ordering.
For the complete explanation of computer check benefits and MICR requirements, see our guide on how to print checks with your computer using QuickBooks.
Why Choose Checkomatic for QuickBooks Online Check Stock
Pre-Calibrated to QuickBooks Online Print Templates
Checkomatic manufactures check stock sized and formatted to match QuickBooks Online's default print templates for all three formats: Voucher, Standard, and Wallet. This minimizes the alignment adjustment needed during the one-time setup step. Most users confirm alignment on the first or second test print.
MICR Pre-Verified Against the Federal Reserve Directory
Every routing number is verified against the Federal Reserve E-Payments Routing Directory before production begins. This catches transposed digits and outdated routing numbers before printing starts. Bank rejection rate for MICR-related issues at Checkomatic is under 0.1 percent across all orders.
In-House Manufacturing in Monroe, NY Since 1997
All QuickBooks-compatible check stock is manufactured at Checkomatic's own facility. No third-party print vendors. Direct manufacturing means lower prices, faster turnaround (3 to 5 business days standard), and a single accountable source for every order. Rush and overnight options are available for urgent printing needs. See shipping and handling for rush options.
Six Security Features at Base Price
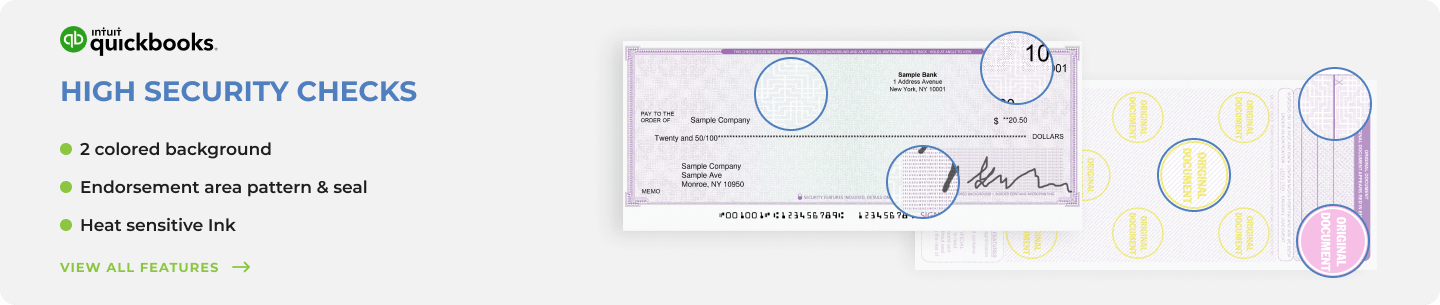
Every QuickBooks-compatible check order includes chemically sensitive paper, microprinting, void pantograph, UV fluorescent fibers, heat-sensitive ink, and pre-encoded MICR at the base price. No security upgrade needed. For a full breakdown of why these features matter, see the benefits of using QuickBooks checks.
50 to 70 Percent Below Direct-From-Software Ordering
Ordering check stock directly through the QuickBooks interface routes your order through a third-party printer with retail markup. Checkomatic manufactures in-house with no middleman. Free black-and-white logo printing is included on every order. For pricing guidance and what to look for when choosing a supplier, see our QuickBooks compatible checks guide.