-
 Contact Us
-
 Re order
-
 Log in
-
 Cart 0
You have no items in your shopping cart.
How to Write Checks in QuickBooks Online and Desktop
Key Observations
- In QuickBooks Online you write a check from + New (+ Create in the newer layout) and then Check. In QuickBooks Desktop you use Banking, then Write Checks, or press Ctrl + W.
- Tick Print later when you want QuickBooks to print the check. Clear it and type the real check number when you are recording a check you wrote by hand.
- If a bill is already entered, pay it through Pay bills, not Write Checks. Otherwise the bill stays open and the vendor balance is wrong.
- QuickBooks prints the payee, amount, date and address. It does not print your routing or account number, so you need check stock with the MICR line already printed on it.
- Most check number problems come from one field: the Starting check no. on the print screen has to match the first physical check in your printer.
Writing a check in QuickBooks takes about a minute once you know where the form is and which boxes matter. Most problems start later, when the check prints with the wrong number, comes out without a routing number, or leaves a bill sitting open.
This guide walks through writing checks in QuickBooks Online and QuickBooks Desktop, recording handwritten checks, choosing between a check and a bill payment, printing, voiding, and the check stock each print style needs. It is written by the Checkomatic team, which has made QuickBooks compatible checks in Monroe, NY since 1997.
Here is how the two versions of QuickBooks compare for the tasks people search for most.
| Task | QuickBooks Online | QuickBooks Desktop |
|---|---|---|
| Write a check | + New (or + Create), then Check | Banking, then Write Checks (Ctrl + W) |
| Queue a check to print | Tick Print later | Tick Print Later |
| Pay an entered bill by check | Pay bills | Vendors, then Pay Bills |
| Print style options | Voucher or Standard | Voucher, Standard or Wallet |
| Void a check | Expense transactions, then Void | Check register, then Edit, then Void Check |
Need check stock that lines up with QuickBooks on the first print? See our QuickBooks checks in voucher, three per page and wallet formats, with a free black and white logo on every order.
What is in this guide
- How do you write a check in QuickBooks Online?
- How do you write a check in QuickBooks Desktop?
- How do you record a handwritten check in QuickBooks?
- Should you write a check or use Pay Bills?
- How do you print the checks you wrote?
- Why doesn't QuickBooks print your routing number?
- Why are your QuickBooks check numbers wrong?
- How do you void or delete a check in QuickBooks?
- How do you write a check to yourself as the owner?
- Which check stock should you buy for QuickBooks?
- Questions about writing checks in QuickBooks
- Questions about printing and check stock
How do you write a check in QuickBooks Online?
To write a check in QuickBooks Online, select + New (shown as + Create in the newer layout), choose Check, pick the payee and bank account, fill in the date and amount lines, then save. QuickBooks records the check as an expense and takes the amount out of the bank account you picked.
- Open the check form. Select + New or + Create, then select Check. It sits with the other vendor transactions.
- Choose the payee. Pick the vendor, employee or customer from the Payee list. If they are not set up yet, add them from the same list.
- Choose the bank account. Pick the checking account the money comes out of. QuickBooks shows the balance it has for that account next to the field.
- Check the mailing address. It fills in from the payee record and prints on the check, so it needs to fit a window envelope.
- Set the payment date. Leave today's date for a check you are about to print. For a check you already wrote by hand, use the date you wrote it.
- Decide on Print later. Keep Print later ticked if QuickBooks will print the check. The check number then shows as To print until you print it.
- Fill in the lines. Use Category details for expenses such as rent, utilities or repairs. Use Item details for products or services from your products and services list. Split one check across several lines if it covers more than one cost.
- Add a memo and save. The memo is optional. Select Save and close, Save and new, or Print check if you want to print it straight away.
What do the Category details and Item details sections do?
Category details and Item details decide where the check lands in your books. A Category line posts to an account in your chart of accounts, such as Office Supplies. An Item line posts through a product or service, which matters when you track inventory or bill the cost back to a customer. Most everyday checks only need Category lines.
Can you write a check in every QuickBooks Online plan?
Writing checks is part of the standard expense tools, so the Check form is available across QuickBooks Online plans. Printing also needs a printer and QuickBooks compatible check stock, which we cover further down.
How do you write a check in QuickBooks Desktop?
To write a check in QuickBooks Desktop, go to Banking, then Write Checks, or press Ctrl + W on Windows (Command + K on Mac). Choose the bank account, payee, date and amount, split the cost on the Expenses or Items tab, then select Save & Close. QuickBooks writes the amount in words for you.
- Open Write Checks. Go to Banking, then Write Checks.
- Pick the bank account. The ending balance for that account shows at the top of the window.
- Fill in Pay to the Order of. The address fills in from the payee record.
- Set the date and amount. QuickBooks fills in the written amount line from the number you type.
- Choose the check number or Print Later. Tick Print Later to print the check in a batch. Leave it clear and type the number in the No. field if you wrote the check by hand.
- Use the Expenses or Items tab. Expenses covers costs such as shipping, loan payments and other costs that are not items. Items covers things you buy that are on your item list.
- Save. Select Save & Close or Save & New.
What is different about writing checks in Desktop?
Desktop gives you more print control than QuickBooks Online. It offers a Wallet check style as well as Voucher and Standard. It also has a printer setup option to turn off printing your company name and address, which you need when your checks already have them pre-printed. Desktop also keeps a check register for each bank account, which is the quickest place to review, edit or void older checks.
How do you record a handwritten check in QuickBooks?
To record a handwritten check in QuickBooks, open a new check, clear Print later, type the number from the paper check, and set the date to the day you wrote it. Then save. Nothing else is needed, and QuickBooks will not try to print it.
The same rule works in both versions:
- QuickBooks Online: clear Print later on the Check form and enter the paper check number in Check no.
- QuickBooks Desktop: leave Print Later clear in Write Checks and type the number in the No. field. If the check pays an entered bill, use Pay Bills and choose Assign check number instead.
What happens when the handwritten check clears the bank?
When the check clears, match the bank transaction to the check you already recorded. Do not add the bank line as a new expense. Adding it again is the most common reason a check shows up twice on the profit and loss report. If that has already happened, undo the added bank line and match it to the original check instead.
Can you record a backlog of handwritten checks quickly?
Yes. If you have weeks or months of handwritten checks to catch up on, entering them straight into the bank account register is faster than opening a new Check form for each one. Enter each check with its real number and date so your reconciliation lines up with the bank statement.
Should you write a check or use Pay Bills?
Use Write Checks (or the Check form) for a payment you are making now with no bill entered. Use Pay Bills when you already entered the vendor's bill. If you write a check against an open bill instead, QuickBooks leaves the bill unpaid and your accounts payable balance is overstated.
This table shows which transaction to use for the most common situations.
| Situation | Use | Why |
|---|---|---|
| You pay a vendor now and no bill was entered | Check | Records the expense and the payment in one step, and can be printed |
| You already entered the vendor's bill | Pay bills (bill payment check) | Closes the bill and keeps accounts payable correct |
| You paid by card or bank transfer | Expense | No paper check is involved, so there is nothing to number or print |
| You wrote a paper check by hand | Check with Print later cleared | Keeps the real check number in your books for reconciliation |
What if you already wrote a check against an entered bill?
If a bill still shows as unpaid after you wrote a check for it, the two transactions are not linked. The usual fix is to change the check so it posts to Accounts Payable for that vendor, then apply it to the bill in Pay bills. If the check is already reconciled, check with your accountant before you change it.
How do you print the checks you wrote?
To print checks from QuickBooks, load your check stock, open the print queue, choose the bank account, enter the number of the first check in the printer as the starting check number, tick the checks to print, and preview before you print. Run a test page on plain paper the first time.
- Load the check stock. Put the checks in the printer the way your printer manual shows for pre-printed forms.
- Open the print queue. In QuickBooks Online, go to Expense transactions and select Print checks (older layouts show Print checks under + New). In Desktop, use the Print option in Write Checks for one check, or print forms in a batch.
- Pick the account and starting number. Enter the number printed on the first physical check in the tray.
- Select the checks and preview. Check that the payee, amount and date look right on screen.
- Print and confirm. After printing, QuickBooks asks whether every check printed correctly. If one jammed or misprinted, tell QuickBooks which ones need reprinting so the numbers stay in sequence.
How do you line up checks before printing?
Use the print setup screen to pick your check style and print a sample on plain paper. Hold the sample over a blank check and look through both against a light. If the fields sit outside their boxes, adjust the alignment and test again before you use real check stock. Our guide to printing checks in QuickBooks Online and our guide to printing checks from QuickBooks Desktop walk through the alignment screens step by step.
Which print style should you choose?
Choose the print style that matches the stock in your printer. Voucher puts one check at the top of the page with two stubs below. Standard prints three checks on one page. Wallet, available in QuickBooks Desktop, prints a smaller check with a stub.
If the style and the stock do not match, every field prints in the wrong place, and no alignment setting will fix it.
Why doesn't QuickBooks print your routing number?
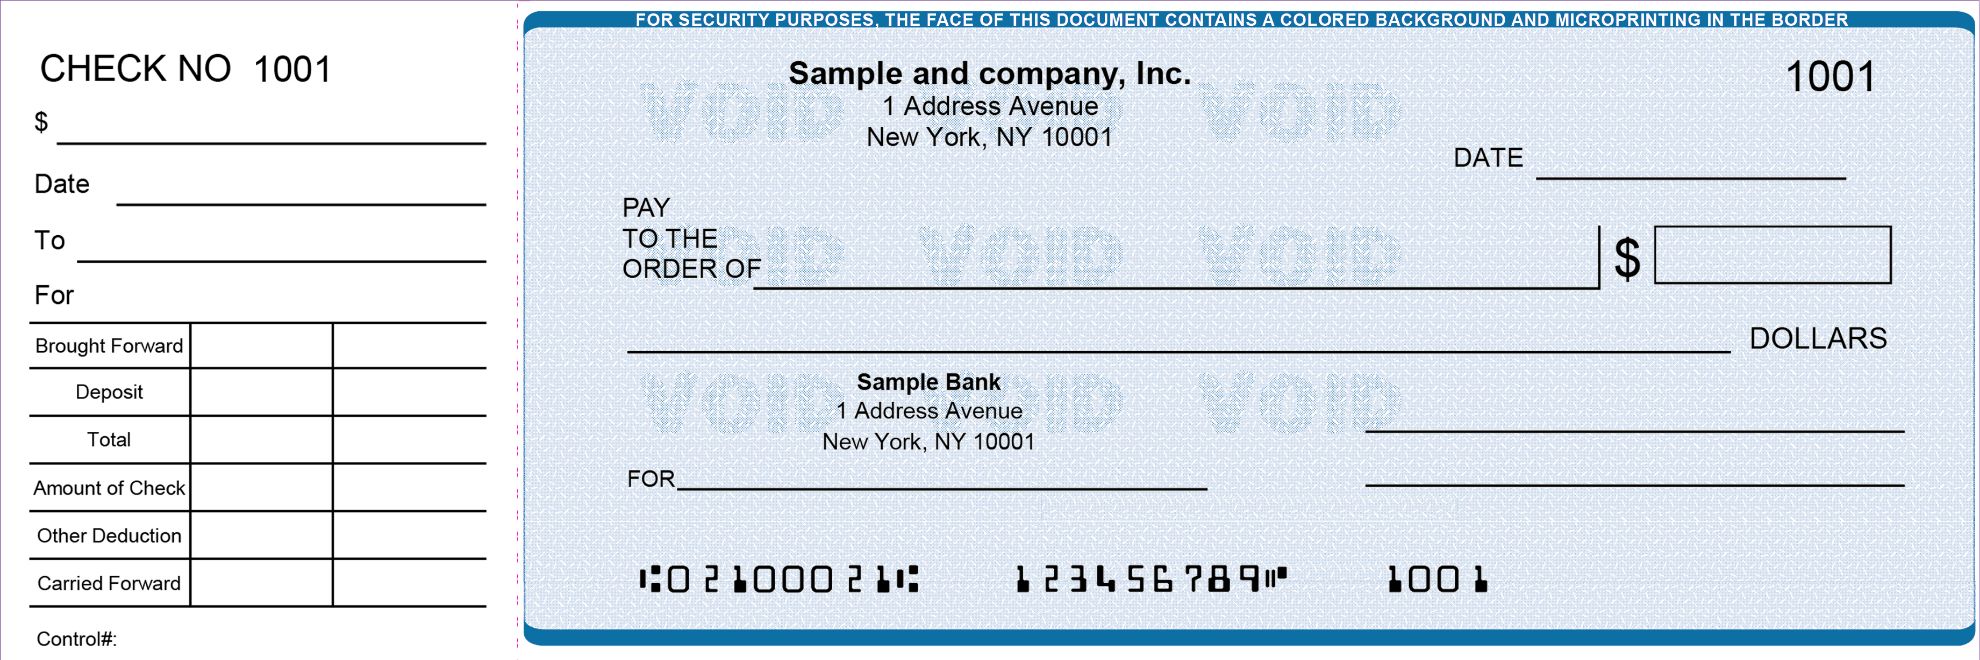
QuickBooks only prints the variable details of each payment: payee, amount, date, address and memo. Your bank routing number, account number and check number sit in the MICR line at the bottom of the check, and that line has to be on the check stock before it goes into your printer. Plain paper or blank stock comes out with no routing number.
The MICR line is printed in magnetic ink so bank equipment can read it. That is why QuickBooks works with pre-printed check stock. Every Checkomatic QuickBooks check ships with the MICR line, your company name and your bank details already printed, so you load the checks and print. There is no MICR toner to buy.
Can you print checks on blank paper from QuickBooks?
Not on its own. QuickBooks Online and QuickBooks Desktop do not print the MICR line, so blank stock needs separate software and a MICR toner cartridge. For most small businesses, pre-printed QuickBooks checks are the simpler route because the bank details are set once, before the checks ship.
Why are your QuickBooks check numbers wrong?
QuickBooks check numbers usually go wrong because the starting check number on the print screen does not match the first check in the printer. QuickBooks numbers a printed batch from that field, not from the number you typed on each check. Set it to the number on the first physical check every time you print.
These are the number problems people run into most, and what fixes each one:
- Printed numbers do not match the paper. Reprint with the correct starting check number, then void any checks that went out under the wrong number.
- The number keeps defaulting to an old value. Type the correct number once on a check with Print later cleared. QuickBooks continues the count from there.
- Check number already in use. Another check in the same account has that number. Open the older check, confirm which one is right, and edit the number on the other.
- Handwritten and printed checks share one account. Keep a note of where each run of numbers stopped, so a printed batch does not reuse a number you wrote by hand.
- The same number appears on every check in Desktop. The check number list in the company file may be damaged. Run the Verify Data and Rebuild Data tools in QuickBooks Desktop, or ask your accountant to.
Why does the printer number checks in reverse?
Some printers stack the printed pages in reverse order, so the numbers QuickBooks printed do not match the order of the paper. Check the output order setting in your printer, or print a short test run on plain paper first. Our post on QuickBooks check printing setup covers printer settings in more detail.
How do you void or delete a check in QuickBooks?
Void a check when it was written but will not be cashed, such as a lost or spoiled check. Voiding sets the amount to zero and keeps the record and number. Delete only a check that was created by mistake and never existed on paper, because deleting removes it from your books.
This table compares the two actions.
| Question | Void | Delete |
|---|---|---|
| Keeps the check number in the register | Yes | No |
| Amount after the action | Zero | Removed |
| Best for | Lost, spoiled or cancelled checks | Duplicate entries made in error |
| Effect on a paid bill | Bill shows as unpaid again | Bill shows as unpaid again |
In QuickBooks Online, find the check under Expense transactions and choose Void or Delete from the action menu. In Desktop, open the bank account register, select the check, then choose Void Check or Delete Check from the Edit menu and record the change. Our guide to voiding a check in QuickBooks Online covers the steps in more detail.
What do you do with a check that jams in the printer?
Record a check for zero under the damaged check's number and void it. That keeps the number sequence complete, so a missing number does not raise questions at reconciliation. If a check from a period you have already closed needs voiding, talk to your accountant first, because changing it can alter balances you already reconciled.
How do you write a check to yourself as the owner?
To pay yourself as a sole owner, write a regular check with yourself as the payee and post it to an owner's draw account in equity. Do not run it as payroll or post it to an expense account. An owner's draw is money taken out of the business, not a business cost.
If you do not have an owner's draw account yet, add one in the chart of accounts under equity before you write the check. Corporations usually pay owners in a different way, so confirm the right setup with your accountant.
Which check stock should you buy for QuickBooks?
Buy check stock in the same format as the print style set in QuickBooks: voucher stock for the Voucher style, three per page stock for Standard, and wallet stock for the Wallet style in Desktop. The stock should arrive with your bank details and MICR line pre-printed, so QuickBooks only adds the payment details.
This table matches each QuickBooks print style to the Checkomatic format made for it.
| QuickBooks print style | Checkomatic format | Layout | Good for |
|---|---|---|---|
| Voucher | QuickBooks check on top | One check at the top of a letter-size sheet, two perforated stubs below | Accounts payable and payroll, where you keep a stub for your records |
| Standard | QuickBooks checks three on a page | Three checks per sheet, no stubs | Higher check volumes where stubs are not needed |
| Wallet (Desktop) | QuickBooks wallet checks | Personal-size checks with a stub | Smaller businesses that want a compact check |
The voucher check on top is the format most businesses start with, because it is the default layout in QuickBooks and gives you two stubs for records. On our product page, the QuickBooks check on top is rated 4.5 out of 5 from 71 customer reviews. Every order includes a free black and white logo, and standard shipping is three to five business days, with Rush B overnight delivery available on your first fifty checks at checkout.
Two extras make printed checks easier to manage. Double window check envelopes show the payee address and your return address through the windows, so there is nothing to address by hand. QuickBooks deposit slips cover the other side of the bank account.
Ready to print your first batch? Order QuickBooks checks made to match your QuickBooks print style, with the MICR line and your bank details pre-printed.
Questions about writing checks in QuickBooks
Where is Write Checks in QuickBooks Online?
QuickBooks Online does not use the name Write Checks. Select + New (or + Create in the newer layout), then select Check. The form works the same way as Write Checks in Desktop.
What is the shortcut for Write Checks in QuickBooks Desktop?
Press Ctrl + W on Windows to open a new check in QuickBooks Desktop. On a Mac, use Command + K. You can also go to Banking, then Write Checks.
How do you record a check you already wrote by hand?
Open a new check, clear Print later, enter the number from the paper check, and set the date to the day you wrote it. Then save. When it clears the bank, match it instead of adding it again.
Can you write one check for several bills?
Yes. Use Pay bills and tick every bill for that vendor. QuickBooks creates one bill payment check for the total and marks each bill as paid.
Why does my check show twice on reports?
The bank transaction was added as a new expense instead of being matched to the check you recorded. Undo the added bank line and match it to the original check.
Questions about printing and check stock
Do I need special checks to print from QuickBooks?
Yes. You need checks formatted for QuickBooks with your bank details and MICR line pre-printed. QuickBooks prints the payment details only, so plain paper will not work as a check.
Which check style does QuickBooks Online support?
The QuickBooks Online print setup offers Voucher and Standard check styles. QuickBooks Desktop also offers a Wallet style.
Can I use an inkjet printer for QuickBooks checks?
Yes. Checkomatic QuickBooks checks work in laser or inkjet printers. Because the MICR line is already printed, your printer only adds the payee, date and amount.
How do I fix checks that print out of line?
Open print setup, confirm the check style matches your stock, and print a sample on plain paper. Hold it over a blank check against a light and adjust until the fields sit in their boxes.
Can I add my logo to QuickBooks checks?
Yes. Checkomatic prints your company logo in black and white free on every QuickBooks check order, and a full color logo option is also available.
Accepted by the world’s leading banks